
 ↗
Alet ve EkipmanSiparişe özel
Luxury Handbag Organizer
Looking for a stylish way to organize your desk while adding a touch of luxury décor?
₺450,00
The Lumetra system keeps growing with new modules, attachments, and more. A dedicated Lumetra Collection was created to keep everything organized. Check it often and follow me for updates!
Tahmini teslim süresi: 1 gün. Renk seçimini sipariş onayında birlikte netleştiriyoruz.
Bu ürün hakkında soru sorun ↗The Lumetra system keeps growing with new modules, attachments, and more. A dedicated Lumetra Collection was created to keep everything organized. Check it often and follow me for updates! All changes and updates related to this model set are listed at the end. Lumetra is a modular stand system designed to simplify the setup of lights, light modifiers, cameras, and backgrounds for product photography. With over 30 parts, it offers hundreds of configurations and supports a wide range of accessories, helping you achieve professional results right from your desk. Featuring extendable columns and ball-joint connectors for easy positioning and adjustment, Lumetra allows for versatile use for: • LED lights or Photo flashes • Smartphones and small cameras • Backgrounds - paper, plastic, fabric, or printed backdrops • Diffusers, color gels and reflective sheets The Ball joints provide 360° rotation around the vertical axis and up to 50° tilt in any direction, giving you flexible control over the arrangement of your equipment. Need adjustable lighting for your setup? The Lumetra Ring Lights mount directly onto the stand's ball socket. Components Overview Lumetra includes four main parts: base, columns, top joints, and optional specialized joints. Base Allows for attachment of columns or equipment directly. • C-shaped and X-shaped weighted stands for on-desk use • A clamp for attaching to desks, doors, windows, cabinets or other furniture • Tripod mount adapter for standard photographic tripods Columns Three extendable sizes are provided - 100–130 mm, 150–230 mm, and 200–330 mm. Use individually, stacked for height, or joined perpendicularly for T-shaped overhead setups for top-down lighting or shooting. Top Attachments for mounting various equipment: • 1/4" screw ball joint for LEDs, cameras, and accessories • 3/8" screw ball joint for compatible photo gear • Cold shoe mount for flashes or LED panels • Flash-style adapter for LED panels with cold-shoe-like bases • Phone holder for flexible phone positioning • Modular rail for backgrounds, reflectors, diffusers, or light color filters Specialized Attachments for expanded functionality: • A-joint for adding a second column alongside, useful for positioning a camera or smartphone behind/in front of a light, or for holding filters or diffusers in front of a light source. • 2-way joints for perpendicular column connections or hanging a counterweight. • Counterweight for stabilizing perpendicular setups • Cable clips to keep cables organized along the columns Printing and Assembly All parts can be printed on a small printer like the A1 Mini, except for the 200 mm column. Use PETG or PCTG for printing, with Bambu Lab PETG HF providing the best surface finish and durability based on tests. The counterweight and rails can be printed in PLA if preferred. Important: • This system includes joints and other parts that work under constant stress. To prevent breakage, always print with very dry filament. This improves layer adhesion and helps produce stronger, more reliable parts. • Some parts, such as the ball screws and columns, have a very small contact area with the build plate. For reliable printing, clean the build plate thoroughly before printing and use print glue for better adhesion. • There are custom fine tuned print settings for each object in the supplied print profiles. To print duplicates of an object, open (never import in a new project) the relevant profile and duplicate the needed object on a new plate. • The ball socket and ball screw must be firmly secured to the joints or braces. Apply a small amount of universal adhesive or epoxy to the threads before screwing them in. • Always keep an LT-nut on the socket, even when not in use, to protect the fins from accidental damage. Base Both the C-stand and X-stand are hollow and must be filled with metal balls, bolts, nuts, small nails, or sand for added weight. After filling, seal the bottom hole with the supplied cap (found in the nuts, bolts, and joints profile). For best surface finish, avoid placing other parts on the print plate. To assemble the table clamp, screw in the long tightening screw until its top is visible. Then, press the round jaw against it until it clicks. Glue a small piece of rubber or thick fabric to the jaws to avoid scratching surfaces. Add a ball socket to the top and/or side of the clamp by applying glue to the threads and screwing it in. Columns The columns are made of an inner column and an outer tube, secured using a column nut (found in the nuts, bolts & joints profile). To install it, remove the inner rod, slide the nut up, press the raised lever down, and screw it in fully. There is an outer brim set, almost fused to the edges. This is to ensure the columns do not fall off during printing. Trim the brim and file the edges at the end. Top mounts • The 1/4" top mount (in the nuts, bolts & joints profile), uses a 1/4"-20 UNC, 1" hex socket cap screw. Apply glue at the base of the screw head and halfway along the thread before inserting. Mounts for 7/8" and 1 1/4" length screws are also included in the archive. • If 1/4" screws are hard to source, an included top mount with a plastic thread and M3x20 support screw can be used, but it’s not as tough. To improve reliability, apply epoxy along the entire M3 screw before insertion and avoid overtightening during use. • The 3/8" top mount also uses an M3x20 screw and requires the same care. • The supplied wide nut will prevent top mounts from loosening during use. For a better grip, consider gluing rubber gasket or thick fabric to the nut’s top side. • The included backdrop rail comes in 2 lengths - 150 mm and 220 mm—but you can scale the length as needed. To attach it to a column, use a rail joint with a ball screw—apply glue to the threads before insertion. To connect two rails, use the provided rail-to-rail joint along with two small rail nuts. • The phone holder accepts a Ball screw from below or the sides for vertical or horizontal use. Specialized Attachments and accessories The A-joint uses a ball socket (from nuts, bolts & joints profile). Apply glue to the bottom threads before screwing it in. The 2-way and optional 3-way joints are assembled in two configurations: with a Ball screw and a tightening bolt or with a hook and a tightening bolt. Apply glue to the threads of the Ball screw or the hook before screwing them in. The counterweight can be printed in PLA if desired and should be filled with metal balls, nuts, bolts, or sand before sealing it with the counterweight eye. Apply glue to the threads to keep it securely in place. Usage Lumetra’s ball joints enable very easy positioning and adjustment. To secure a ball ended component into a socket, an LT-nut (loosen–tighten nut) is used. Place the nut on top of the socket but do not screw yet, then push in the component’s ball end into the socket. Finally, tighten the LT-nut. To adjust tilt or rotation, apply force until the desired position is reached, no need to loosen the nut. To disassemble a joint, unscrew the LT-nut and pull out or tilt the ball end until it pops out. If the LT-nut is overtightened and cannot be loosened manually, use the provided LT-wrench to assist in loosening it. The columns are extendable, with three sizes provided: 100–130 mm, 150–230 mm, and 200–330 mm. To adjust height, loosen the locking nut, move the inner column, then tighten the nut back. Use an LT-nut to attach mounts Bu ürünün çizimi MakerWorld'den alınmıştır. Yapımcıya teşekkür ederiz. Bu ürün tasarımcının izniyle üretilmektedir.
3D baskının doğal katman izleri ürün yüzeyinde görülebilir. Ekran görüntüleri ile gerçek ürün rengi arasında küçük farklılıklar olabilir.
↗Looking for a stylish way to organize your desk while adding a touch of luxury décor?
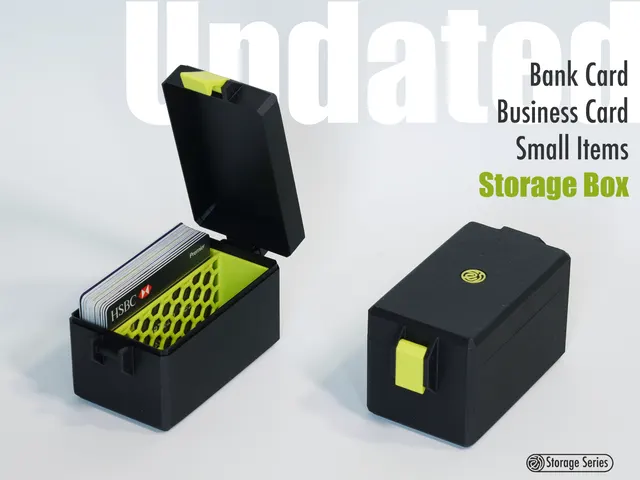 ↗
Card Storage Box|Bank Card Storage Box|Small Item Storage Box|business card box|Card Organizer
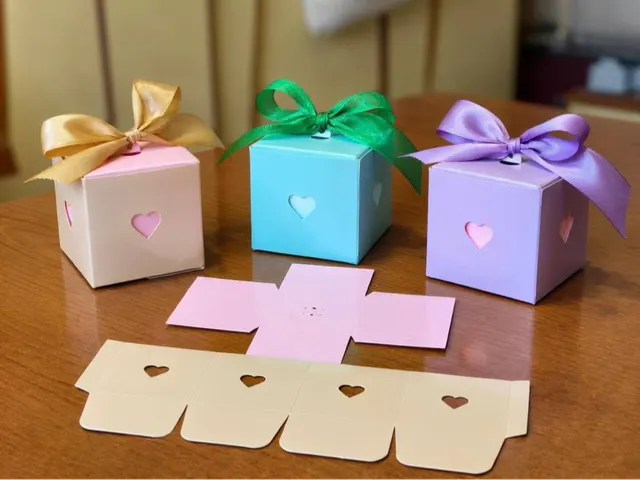 ↗
The best gift box you will be able to print if you are looking for one that is elegant, practical and economical!
 ↗